◆Apps in the app store are restricted by the sandbox and can only scan disk image files.
◆We provide Disk Assistant for free, use Disk Assistant to create disk image files, and then use data recovery software to load the disk image files to restore lost files;
◆Run data recovery at the same time, Disk Assistant can restore local disks and move Lost files on disk.
◆If your system is a version of MacOS10.13 or later, you need to recover the lost files on the system disk, you need to enter the recovery mode, and run the Disk Assistant to recover the lost files.
◆Please do not install software, copy files, create new files, or run any software in the partition where the data is lost, because these operations will damage your lost files.
◆If you have purchased the data recovery software, please ask us for the serial number, if you have not purchased it, please buy it.
Ⅰ Disk assistant use steps:
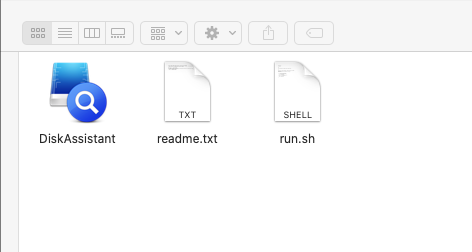
1. Download Disk Assistant to the partition where no data is lost. It is a compressed package and there are three files after decompression. For versions after MacOS10.13, to restore the lost files on the system disk, please click detailed steps
2. Versions before MacOS10.13 can run Disk Assistant directly.
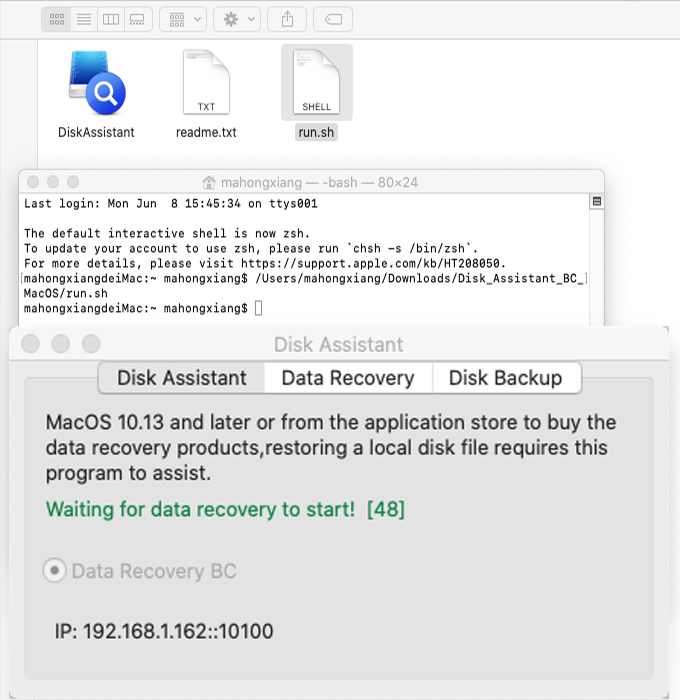
For versions after MacOS10.13, please start the terminal (Applications ➤ Utilities ➤ Terminal), drag the "run.sh" file to the terminal, and press Enter.
3. Now you have two ways to recover lost data:
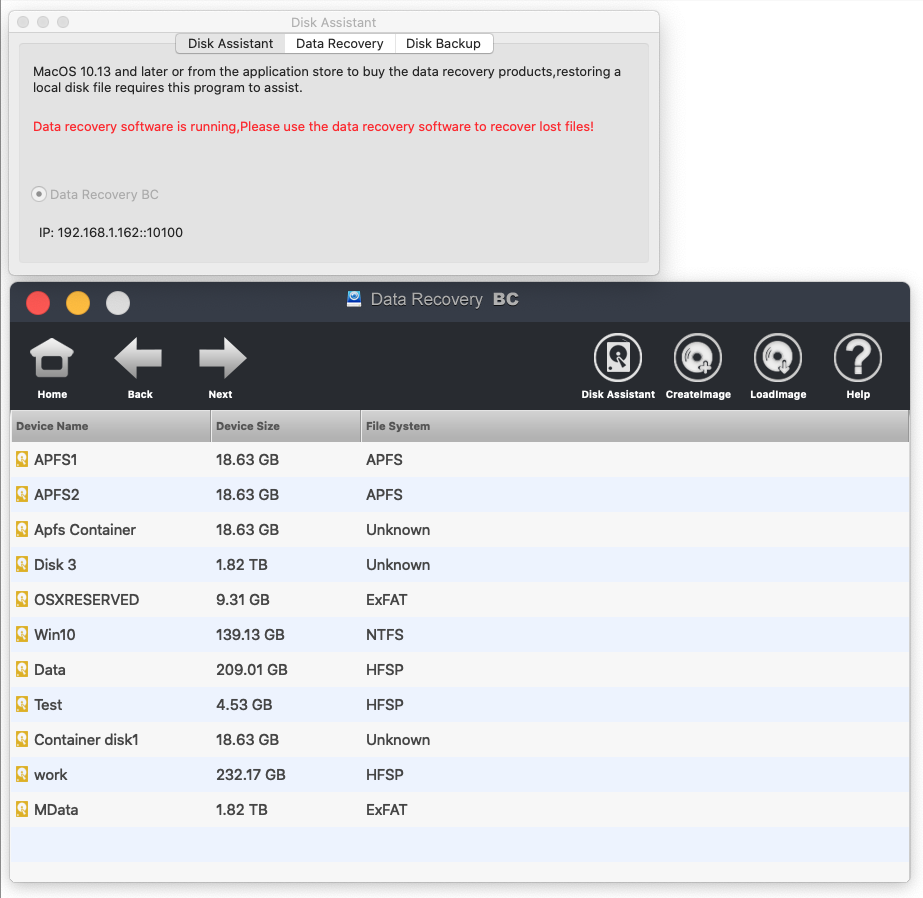
a. To start the data recovery product downloaded from the application store, it is necessary to keep the disk assistant and data recovery running at the same time. For other steps, please refer to the data recovery help document.
b. Use Disk Assistant to recover directly. Please ask us for the serial number first, which is needed during the recovery process.
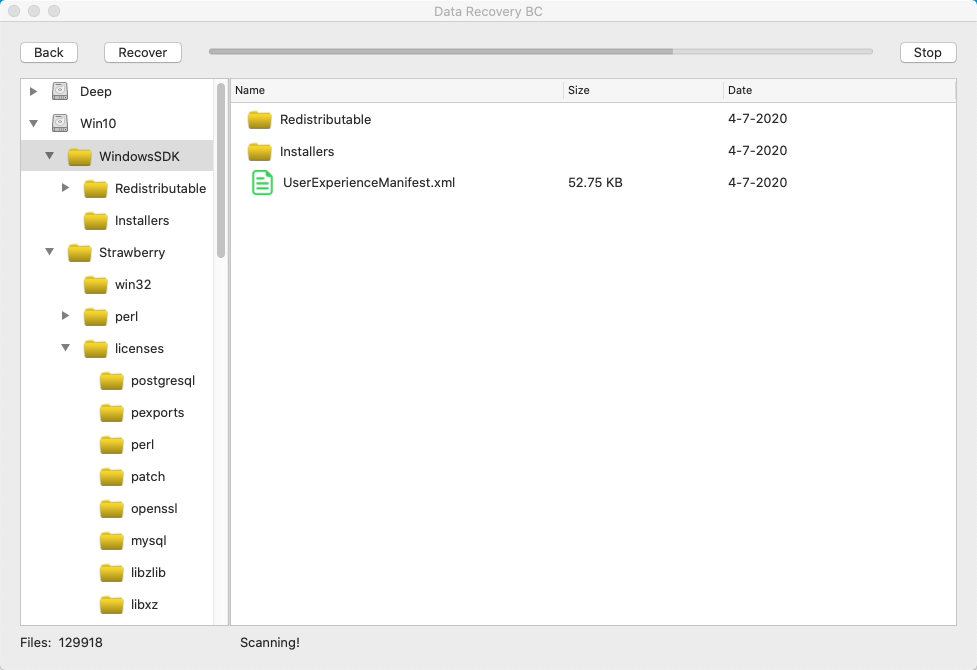
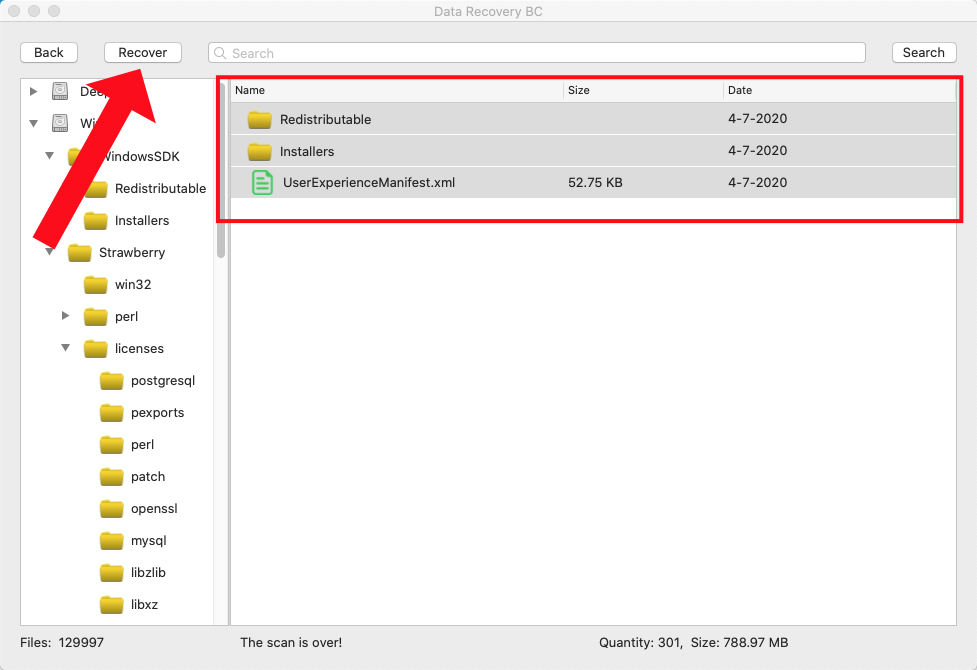
◆Select the partition where the data is lost, select full scan, and click scan.
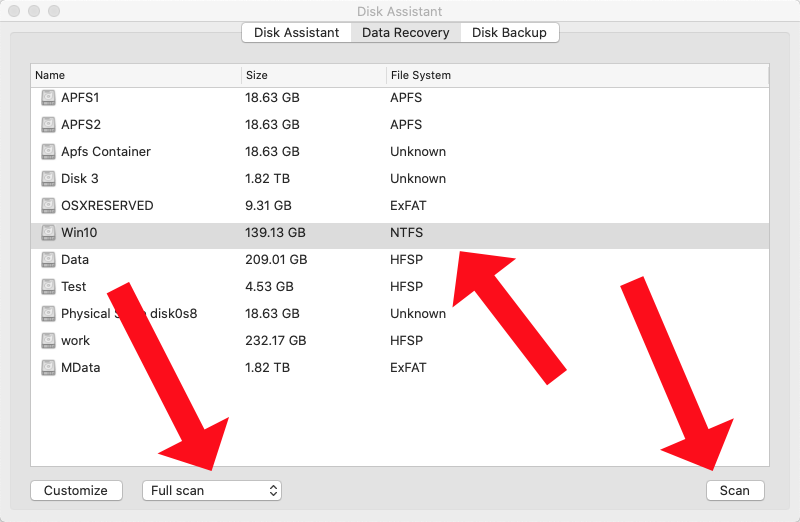
◆Wait for the scan to finish, select the file or directory and click "Recover".
ⅡRecover lost files on system disk
Please ask us for the serial number first, it will be needed during the recovery process,1. Prepare a writable removable disk, the file system is: exFAT, fat32, hfs, hfsp, apfs, the remaining space of the removable disk should be greater than the system disk, the name is changed to "temp", copy the disk assistant Three files to the root directory of the removable disk.
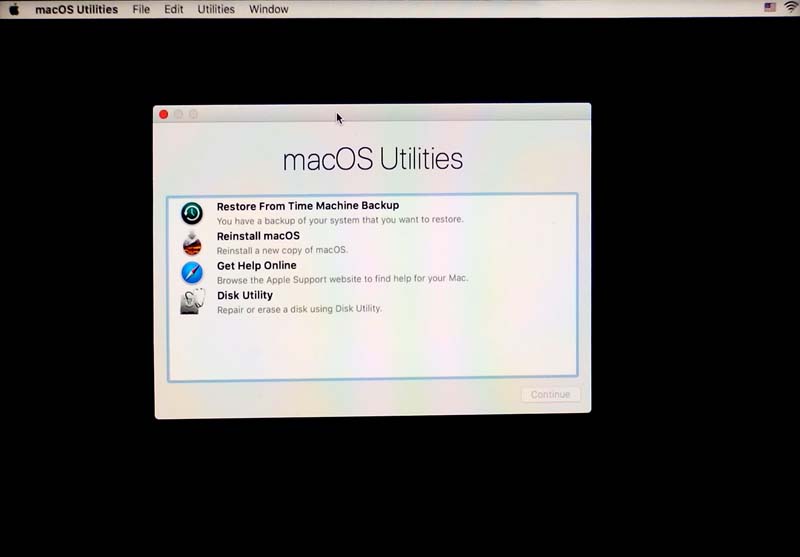
2. MacOS enters recovery mode: In the shutdown state, long press Command+R, then press the power button to start the computer, until the progress bar appears, then release the Commang+R key, successfully enter the recovery mode as shown below:
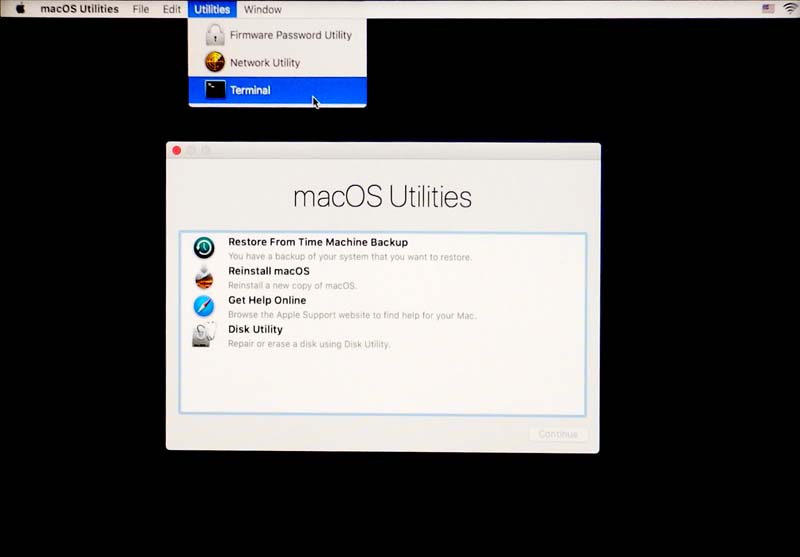
3. Start the terminal command line tool, as shown below:
4. Enter the directory where Disk Assistant is located and start Disk Assistant, please refer to the following commands:
Command "ls": lowercase letters, shorthand for "list", display all files and directories in the current directory.
All commands and parameters are case sensitive, if an error is prompted, just re-enter it.
| Commands and parameters | Instructions |
|---|---|
| cd /Volumes/temp | |
| ls | |
| ./run.sh |
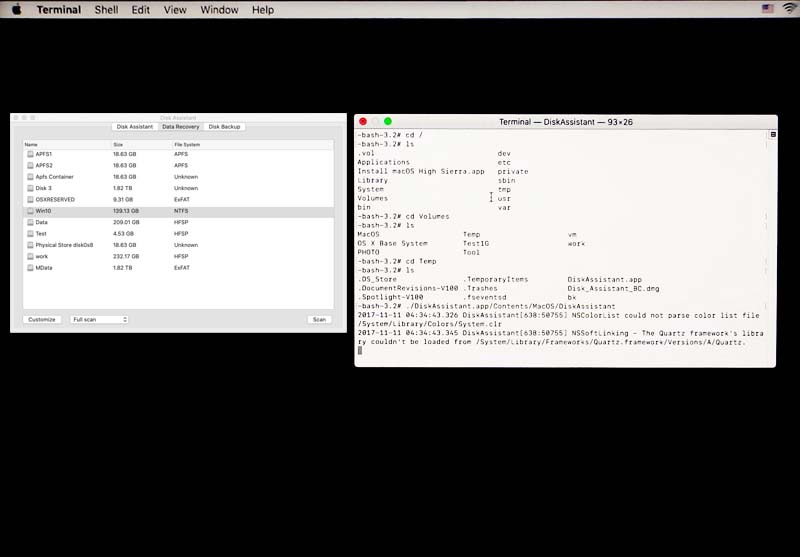
4. After successfully starting the Disk Assistant, click "Data Recovery":
◆Select the partition where the data is lost, select full scan, and click scan.
◆Wait for the scan to finish, select the file or directory and click "Recover".


